Tag: css styling

  • Add Slim Subscription Box in Header to Increase Blog Readers

    Not getting enough readers for your blog ? It doesn’t matter if blog content is unique or covers latest news, tRUth is that, a reader will come, read the content or will exit away and never return. While going through thecreatology stats, I analyzed that RSS Subscription was not performing well because of its placement in footer. Guess what, you can now see another slim subscription box above content box on thecreatology blog. It looks similar to the screenshot below:

    Slim Subscription Box TheCreatology
    Slim Subscription Box TheCreatology

    The point is that, if you offer FREE Subscription of Blog Updates and maintain a subscriber list then it will certainly help you to get loyal visitors on blog. Well, if you want to add attractive subscription box in WordPress blog, then you can follow rest of the article.

    In this article, we will learn to Add Slim Subscription Box in Header to Increase Blog Readers. Below are quick steps for the same:

    Getting Started

    Before we start with the tutorial, I want you to make sure that your WordPress, Plugins and Theme are updated with latest versions. If you are using Thesis Theme then you can Safely upgrade to latest version Thesis.

    Add Subscription Box in Header

    In this example, we are going to add RSS Subscription box which I believe is most commonly used and FREE too. Find the code for RSS Subscription box below and paste in single.php or  header.php file of the currently activated theme. If you are using Thesis Theme, then paste the code in custom_functions.php file using thesis hook before content. PHP code is as under:

    NOTE: Make sure you take full backup of functions.php file or custom_functions.php file using FTP before modifying the original file or you can also refer to the article about how to safely edit custom_functions.php.

    [php]
    <!–Do not remove this line
    Designed by TheCreatology–>
    <div id="slim-subscribe">
    <span>Need Blog Updates?</span>
    <form action="http://feedburner.google.com/fb/a/mailverify" method="post" target="popupwindow" onsubmit="window.open(‘http://feedburner.google.com/fb/a/mailverify?uri=thecreatology’, ‘popupwindow’, ‘scrollbars=yes,width=550,height=520’);return true">
    <h4>Subscribe to TheCreatology via <a href="http://feeds.feedburner.com/thecreatology" target="_blank" rel="nofollow">RSS</a> | <a href="http://feedburner.google.com/fb/a/mailverify?uri=thecreatology">Email</a></h4>
    <input type="text" name="email" value="Your e-Mail address…" onblur="if (this.value == ”) {this.value = ‘Your e-Mail address…’;}" onfocus="if (this.value == ‘Your e-Mail address…’) {this.value = ”;}">
    <input type="hidden" value="thecreatology" name="uri"/>
    <input type="hidden" name="loc" value="en_US"/>
    <input type="submit" value="Subscribe">
    </form>
    </div>
    <!–Designed by TheCreatology, Author: Aky Joe–>
    [/php]

    Style Subscription Box CSS Code

    After adding the HTML part, we definitely require to add CSS code to make it look attractive. Subscription box style code is as under:

    NOTE: Make sure you take full backup of style.css or custom.css file using FTP before modifying the original file.

    [css]

    /*
    Author: Aky Joe
    URL: http://akyjoe.thecreatology.com
    */
    #slim-subscribe{ background:#E2F7A8; border: 1px dashed #A6DFFA; height: 70px; margin: 20px 0 0; font-family: Arial;}
    #slim-subscribe span{color: #f60; text-decoration: none; font-family: comic Sans MS; font-size: 26px; line-height: 65px; margin: 0 0 0 20px;}
    #slim-subscribe h4{font-size: 12px; margin:5px 0;}
    #slim-subscribe h4 a:hover{text-decoration: underline;}
    #slim-subscribe form{float: right; margin: 5px 20px 5px 0;}
    .txt-blog,.txt-blog:focus{background:#fff; border: 1px solid #b7cb80; border-radius:5px; padding: 6px 10px; width: 180px; font-size: 15px; color: #888;}
    .btn-blog,.btn-blog:focus{background:#555; border: 0; border-radius:5px; padding: 6px 10px; font-size: 15px; color: #fff; text-shadow:1px 0 2px #333;}
    .btn-blog:hover{background:#333;}

    [/css]

    Did you Play with the Code ?

    Did you copy the code as it is ? Well, if yes then I recommend you to replace HTML part saying “thecreatology” with your RSS feedburner ID. Also you can play with the CSS to change background color of box and font color matching blog theme. Don’t change its size as fat body covers a lot of space, so let it be slim like me mine. 😉

    We’re Done!

    Wow subscription box looks good now, ‘eh ? If not, I would say NEVER STOP PLAYING. And here we come to the end of tutorial add subscription box in header to increase blog readers. I hope it was easy, if not? you can also hire me to add-style subscription box for you. If you have any query or further assistance is required, post your feedback as a comment below.
  • How to style Sidebar Widget with different color in Thesis Theme ?

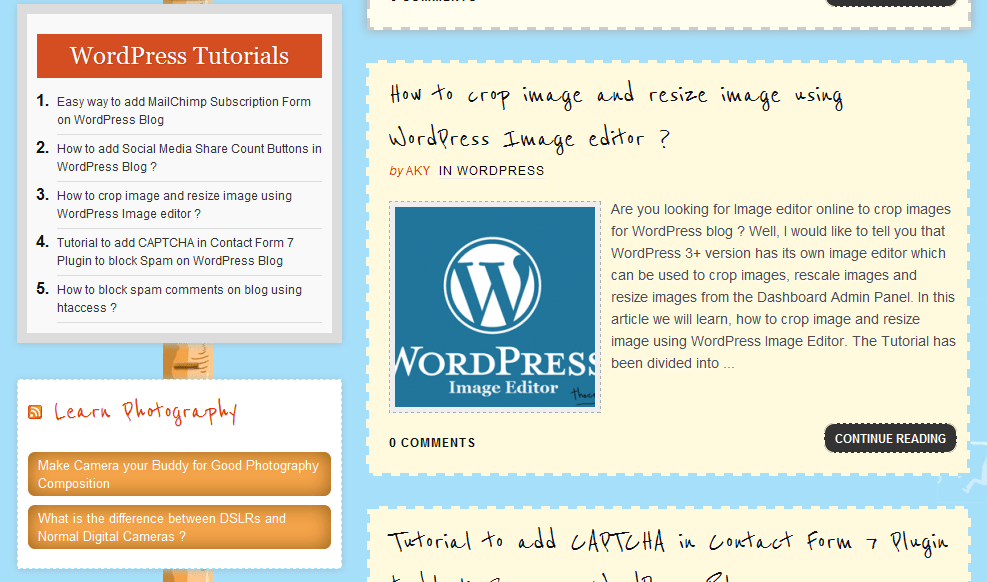
    Couple months back, a blogger friend who is also thecreatology blog follower, requested a Thesis Theme tutorial for styling sidebar widgets. As we all know that sidebar is an important element of blog, where we put advertisements, social media promotions and subscriptions. Hence, by making sidebar widgets eye catchy will increase blog hits and decreases bounce rate. For instance, you can check out the screenshot below (click to enlarge the image):

    thecreatology sidebar widget design
    TheCreatology Widget Styling

    As you can see in the above screenshot, the sidebar is on left side, whereas in most blogs you will find it one on right side. But doesn’t matter if it is on left or right, all what matter is that sidebar should be made eye catchy. In this article you will learn how to style sidebar widget with different color in Thesis Theme.

    Getting Started: Update Thesis Theme

    To make sure that we are sailing on the same ship, I recommend you to update Thesis Theme. Don’t know how to do that ? Well, just refer to article Safely upgrade to latest version Thesis 1.8 ? If you don’t have Thesis Theme Copy then you can also Download Thesis Theme.

    How to style sidebar widget ?

    Thesis Theme is no ghost, so you can always play around with its customization. Customizing sidebar in thesis theme can be done by applying CSS code, rest I leave it on your skills. I know you will not let me down. (Giggle)

    A sidebar may contain different types widgets, for instance a text widget or a recent post list widget and etcetera. So, make sure you analyze your need, before copying the code.

    CSS Code to Style Thesis Sidebar

    Hmm! So we have reached the ammunition, where will not find any armory or magazine, but the CSS code to style sidebar widget. Find the CSS code below:

    Make sure you take full backup of custom.css file using FTP before modifying the original file.

    Sidebar List Widget  CSS Code

    [css]

    .custom .sidebar ul li ul li a{background:#E5ECF9;border: 1px solid #AABCE0;border-radius: 7px; color: #FFF; display: block;font-size: 13px; padding: 4px 10px; margin:2px 0;}

    .custom .sidebar ul li ul li a:hover{background:#D3DCED;}

    [/css]

    Thesis Killer Recent Entries CSS Code

    [css]

    .custom #widget_killer_recent_entries-2{background:#BFE2F2; border:10px solid #77D6FF;}
    .custom #widget_killer_recent_entries-2 h3{padding: 5px 0; margin: 10px 0; font-size: 18px; font-weight: bold; text-align: center; color:#fff;}
    .custom #widget_killer_recent_entries-2 ul { font-size: 14px; font-weight: bold; list-style: decimal; margin: 0 0 0 20px;}
    .custom #widget_killer_recent_entries-2 ul li { border-bottom: 1px solid #ddd;margin: 0; padding: 5px 0;}
    .custom #widget_killer_recent_entries-2 ul li a { color: #333; display:block; font-size: 12px; font-weight: normal; background: transparent; padding: 0;}
    .custom #widget_killer_recent_entries-2 ul li a:hover {color:#e33e00;}

    [/css]

    Did you copy the right code ? This is just to remind you about the code which you analyzed before coming to this step.

    We’re Done!

    After that you have copied the correct code, save custom.css file and upload it on server. And if, you are using custom file editor from your dashboard admin then just hit Big Ass Save Button. Once done, refresh the website and check out sidebar styling and if you are not satisfied then you can play around with CSS code.

    With this we come to the end of tutorial to style sidebar widgets in Thesis Theme. I hope it was easy, if not? you can also hire me to do style sidebar widgets for you. If you have any query or further assistance is required, post your feedback as a comment below.
  • Tweak to remove the dotted outline around a link

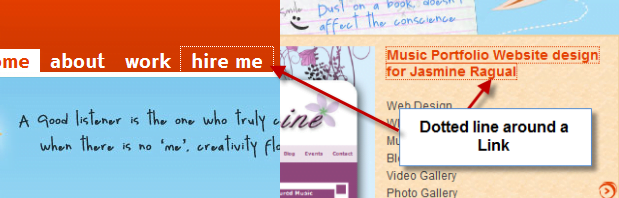
    Are you annoyed of the dotted outline around link when it gains focus or get active? Well, most of us use Firefox, and by default Anchor links have dotted outline around them, when they get active or gain focus. Below screenshot which will clear you more:

    Remove Dotted outllines around link
    Dotted outlline around link

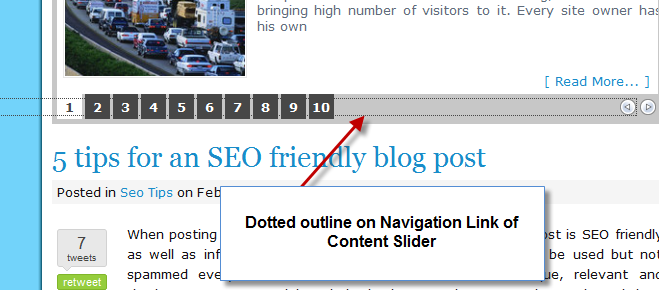
    Usually outlines around small size links don’t get in notice, but if a link is “h1” heading then it really affects the readability. Also the websites which are using content sliders, you will notice the navigation arrows have big dotted lines around them and floated from left which looks more ugly and. Just like one in the screenshot below:

    Remove Dotted Line on Content Slilder
    Dotted Line on Content Slilder

    How to remove ?

    Many instances we find these outline important as they justify us about the link, but few instances like the content sliders or floated items, it really looks undesired. In this article, I will share a simple tweak to override the browser’s default css, and it will remove dotted outline around all links.

    [css]
    a {
    outline: 0;
    }
    [/css]

    Copy-Paste the above code snippet in the Style.css file of the website or blog. If we don’t want to remove outline completely, for instance active state of links should have outline enabled and removed for focus and mouseover states. The code for the scenario will look like as give below:

    [css]
    a: hover, a:focus {
    outline: 0;
    }
    [/css]

    Copy-Paste the above code snippet in the Style.css file of the website or blog. Further save and refresh to see the effect, you will find the outline is not visible while links gaining focus.

    We come to the end of this article, though it was a three line code and but important for many of us. If you have any query or any further assistance required post comments as your feedback.

  • 3 best ways to style blockquote for your blog

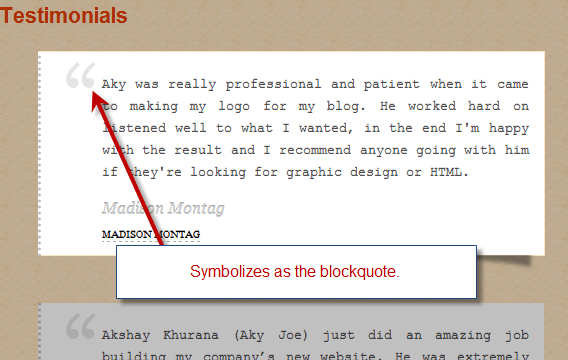
    A blockquote is a XHTML tag which is purposely used element in an article. The basic usage of blockquote in an article is when an author wants to post a thought, or a long piece of sentence from another resources or another author. Just like I did on my testimonials page, where the text posted is in voice of a different author, and hence I wrapped it between a blockquote tag. Screenshot below might just clear you a bit.

    thecreatology-blockquote-design

    A blockquote usually highlights a text and break it apart from main content. For idealistic authors blockquote is tool to make an article more interesting for the reader. A double quote character (“ This is my thought! “) represents the content as a phrase, quote or a thought.

    Usually every web browser has a default styling for Blockquotes, but we can always refine a default styling with something in relevance with theme, or may be out of the box design. In this article, I will share 3 best ways to style blockquote for your blog, using CSS.

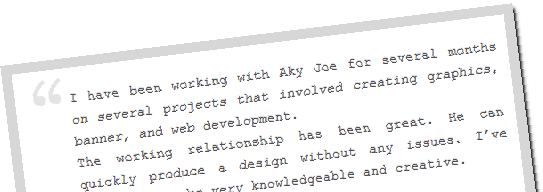
    Style 1: Blockquote styling with Images

    With CSS, we are no just limited to color, we can always use background images so as to make blockquote distinct with content. Adding image to blockquote will make it eye-catchy and elegant. We will also have to add left padding, so that text doesn’t overlap the image. Screenshot below will make it more clear:

    thecreatology-blockquote-image-design

    Below, is the CSS code to add an image to blockquote which you can append in theme’s stylesheet, STYLE.CSS or CUSTOM.CSS (for Thesis Theme):

    [css]

    blockquote{
    background:url(‘blockquote.png’) no-repeat;
    padding: 5px 5px 5px 20px;
    border:3px solid #ddd;
    }

    [/css]

    Style 2: Blockquote styling with Drop Caps

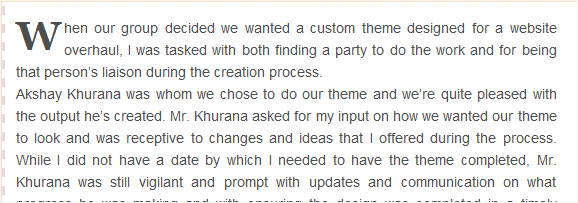
    Adding Drop caps to a content, is a Latin initialis typographic approach, which means standing at the beginning. Drop cap is decorating the initial letter of a paragraph and making it more attractive. In this example, I have added drop cap to blockquote, using the pseudo class to increase the size of the first letter in the paragraph. You can also refer the screenshot below, to add drop cap in blockquote:

    thecreatology-blockquote-dropcaps-design

    Below, is the CSS code to add an image to blockquote which you can append in theme’s stylesheet, STYLE.CSS or CUSTOM.CSS (for Thesis Theme):

    [css]

    blockquote{
    background:#fff;
    padding: 10px;

    border-left:2px dashed #ddd;

    }

    blockquote p:first-letter {
    float: left;
    margin: 5px 3px 1px 0;
    font-family: Georgia;
    font-size: 40px;
    font-weight: bold;
    }

    [/css]

    Style 3: Blockquote styling with Fonts & Colors

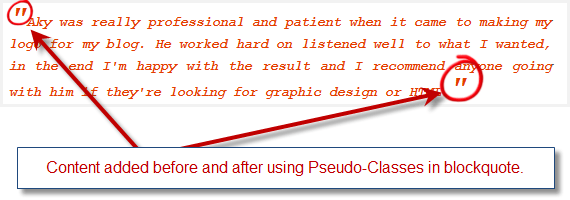
    If you find above styles, like using images and drop caps, a bit complex then you can consider another way which is simple yet highly effective style for blockquote. Font property itself has so many attributes for styling, for instance font-style (italics) or font-variant (small-caps). In this example, will require the use of pseudo-classes in order to insert content before and after the blockquote. Screenshot will clear it more:

    thecreatology-blockquote-fonts-design

    Below, is the CSS code to add an image to blockquote which you can append in theme’s stylesheet, STYLE.CSS or CUSTOM.CSS (for Thesis Theme):

    [css]
    blockquote {
    color: #e33e00;
    font-style: italic;
    font-family:’Courier New’, Courier, monospace;
    padding:20px;
    background:#fff;
    }
    blockquote p:before {
    content: ‘"’;
    font-size: 30px;
    }
    blockquote p:after {
    content: ‘"’;
    font-size: 30px;
    }
    [/css]

    I am using blockquote styling for my blog as well, and you can see the demo as below.

    Blockquote Style Demo:

    A body makes his own luck, be it good or bad.

    If you have seen any other example or have an idea to style a blockquote, I would like to hear from you. If you have any queries or if further assistance is required in regard of the article, post comment as your feedback.