Few days back, I mentioned about Image Caption Problem with WordPress 3.4 upgrade and about release of Thesis 1.8.5. Well, Chris Pearson, is a man of his words and has released a Bug Fix Version of Thesis Theme. According to Chris, this version has not only fixed image captions but has also resolved Multisite Installation bugs.
Get Thesis Theme 1.8.5
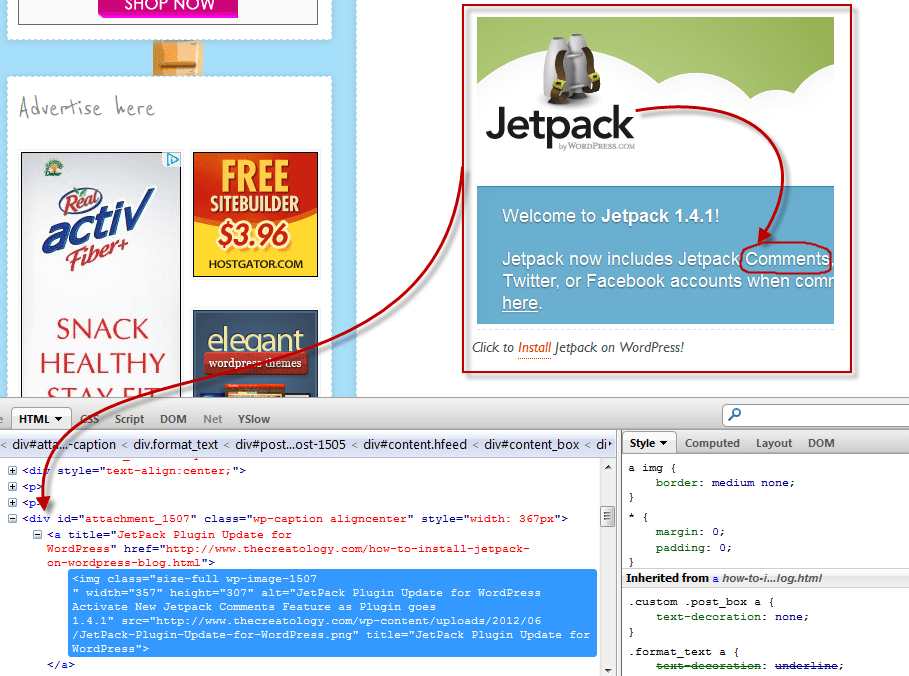
I figured that out myself, after upgrading to latest version of thesis theme and found all images boxes aligned properly, way they were before upgrading to WordPress 3.4. I did check the post markup, and it was neat, where all image captions were properly wrapped inside the div tags. Check out the screenshot for the same:
Image Captions Fixed (Click to Zoom)
How to Upgrade Thesis Theme
It’s recommended to keep your Thesis Theme updated to have maximum efficiency from your one-time investment. Follow this easy tutorial to Upgrade Thesis Theme.
Thesis 1.8.5 Release Notes
Check out, official release notes for Thesis 1.8.5, here.
That’s it, ‘eh?
Yes! Upgrading to Thesis Theme 1.8.5 will certainly resolve, image caption issue and all other problems with WordPress 3.4, hopefully.
If you still have problems with Thesis or WordPress 3.4, then you can share them with us, by posting a comment below.
It is amazing how Jetpack Plugin is improving day-by-day and introducing new features. Last Jetpack Plugin update was about new contact form option for Feedbacks and this time its enhanced Commenting System for WordPress. Arrh…that wasn’t loud! Let me say that again… Jetpack has added New JetPack Comments Feature, with its new version 1.4.1.
Not sure what is Jetpack all about ? Click here to know more about Jetpack Plugin or click the JetPack picture below:
Click to Install Jetpack on WordPress!
Whats New in Jetpack Plugin ?
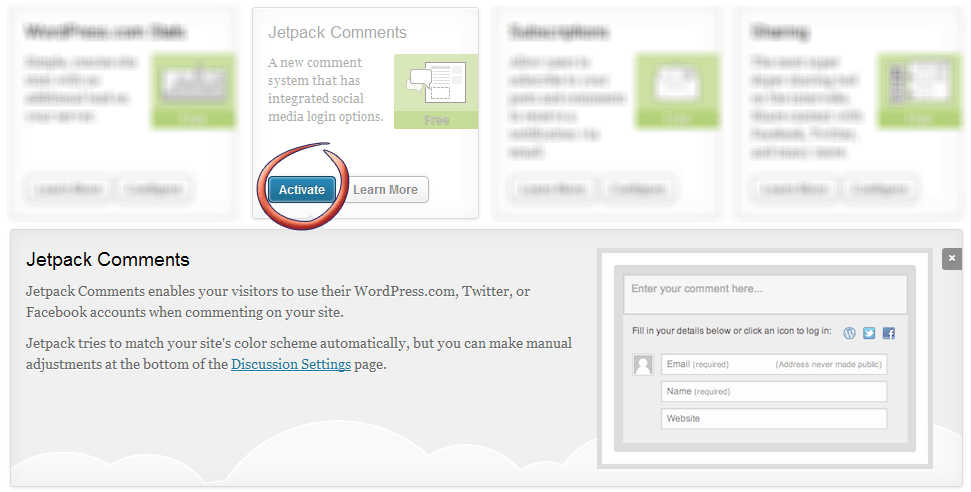
The new JetPack Commenting System extends capabilities of conventional WordPress comments. You will find JetPack Comment widget in Dashboard once you have updated the plugin. It looks like below screenshot:
Jetpack Comments Widget in Dashboard
How to get Jetpack Comments Feature ?
To get Comments Feature in blog, you will have to update Jetpack plugin. If don’t know how to update Jetpack Plugin follow a quick procedure below:
Login to WordPress Admin Panel and Navigate to Dashboard > Plugin.
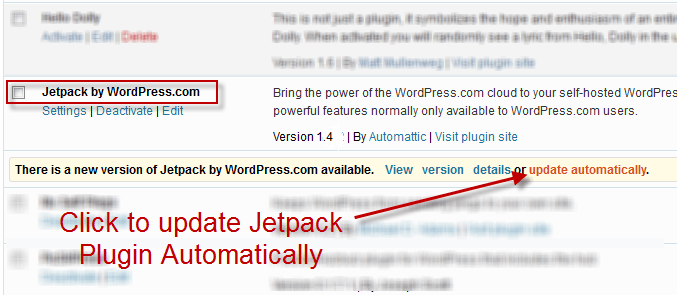
Find Jetpack Plugin Listed with other plugins. Click on Update Automatically link in orange, just like in the screenshot below:
Click on Update Automatically Link
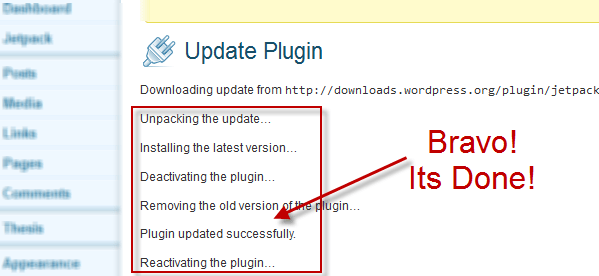
After clicking the link you will get redirected to update plugin status page and you will see something similar as below screenshot.
Plugin Updated Successfully!
Done? Now navigate to Dashboard > Jetpack to see JetPack Comment Widget.
Pros & Cons for JetPack Comment
Hah…you must be wondering about whether its worth installing on your WordPress Blog or it is not. Hmmmm…the list of Pros & Cons is especially for you to figure out, read below:
PROS FOR INSTALLING JET PACK COMMENTS
Allows a commenter/visitor to use WordPress.com, Facebook or Twitter Account while posting a Comment on your site.
Enhanced Comment Form with jQuery Animation
3 different Themes for Comment Form: Light, Dark & Transparent.
jQuery Validation for required Fields.
CONS FOR INSTALLING JET PACK COMMENTS
Still using div html tags which states it is not on HTML5 completely.
Doesn’t work with Thesis Theme or other frameworks.
Increases page load time by 0.5-1 second/s.
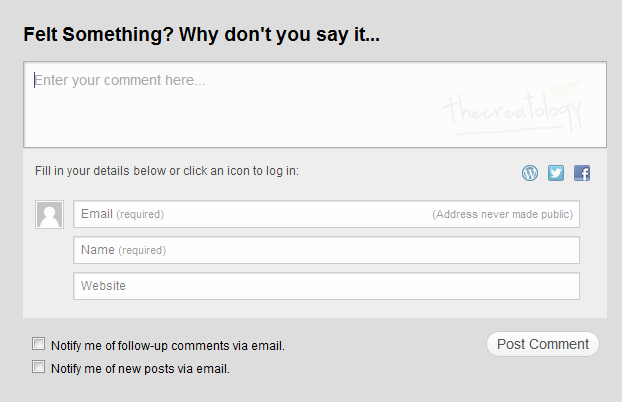
Here is how a JetPack Comment Form looks like, on Twenty Eleven Theme:
Jetpack Comment Form on Twenty Eleven Theme
What do you think ?
Isn’t it feel good to have your WordPress Blog up-to-date & with latest features ? I believe nothing can beat that feeling, so what do you think about it? Share your thoughts with us about this New Jetpack Comments Feature introduced with Plugin Update 1.4.1. Of course, you can post a comment below. 😉
Few hours back, WordPress notified to update Jetpack Plugin, which made me curious about new features. In last Jetpack Plugin update, New Subscription option was added with Extra Sidebar Widgets making easy for lazy bloggers. Hmmm…what we have now ? Well, Jetpack has added New Contact Form Feature, as they say its time to trash all other contact form plugins. 😛
Not sure what is Jetpack all about ? Click here to know more about Jetpack Plugin.
Know more about JetPack Plugin ?
Whats New in Jetpack Plugin ?
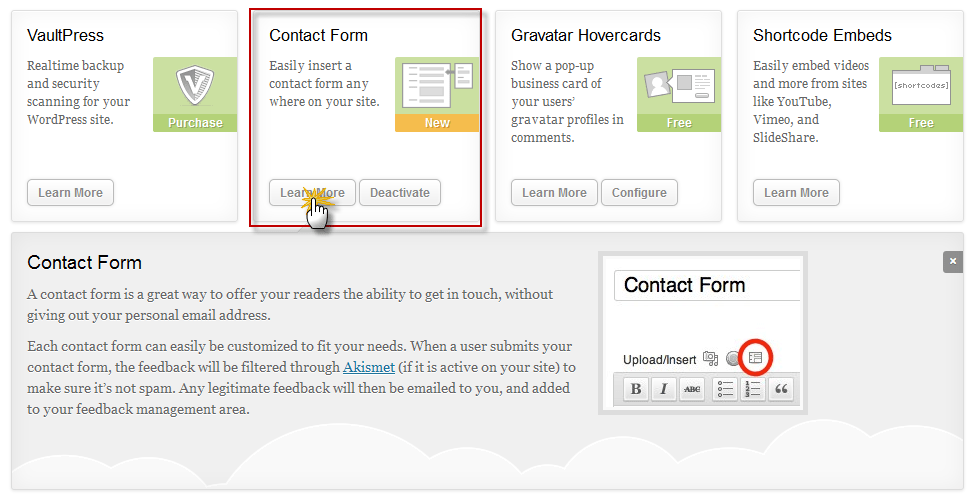
Contact Form widget is what you will find in Jetpack Dashboard after updating the plugin. It looks similar to below screenshot:
Contact Form Widget
Get Contact Form Feature Jetpack Plugin
To get Contact Form Feature in blog, you will have to update Jetpack plugin. If don’t know how to update Jetpack Plugin follow a quick procedure below:
Login to WordPress Admin Panel and Navigate to Dashboard > Plugin.
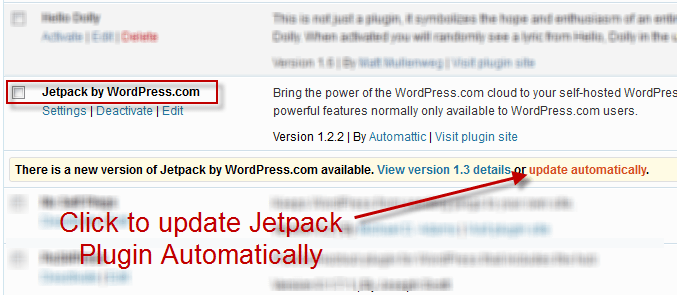
Find Jetpack Plugin Listed with other plugins. Click on Update Automatically link in orange, just like in the screenshot below:
Click Update Automatically Link
After clicking the link you will be redirected to update plugin status page. If you have good web hosting, then it will not take more than 5 seconds to update Jetpack Plugin and you will see something similar as below screenshot.
Jetpack Update Status
Well, we are done. Navigate to Dashboard > Jetpack to find Contact Form Feature Widget.
Share Your Views
I am sure this new update excites you as well, don’t forget to share your thoughts with us about New Contact Form Feature in Jetpack Plugin, by posting a comment below. 😉
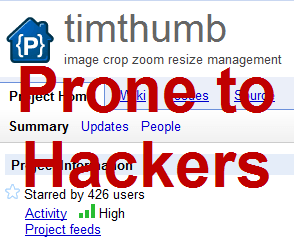
I am wondering why there is no update from DIY Themes about new version of Thesis Theme as timthumb file is making Thesis Theme Websites vulnerable to hackers. It has been reported that certain version of Timthumb script http://code.google.com/p/timthumb/issues/detail?id=212 holds security hole and Thesis Theme uses Timthumb.php file for re-sizing an image. I have no clue when new Thesis version will arrive, hence being on safer side why don’t we just update Timthumb file manually. 😉
Timthumb file prone to hackers
Therefore this vulnerability may also exist in your WordPress Theme or a Thesis Theme. For people who have followed this article How to auto generate thumbnail in Thesis Theme without Plugin, I strongly recommend you to update timthumb.php file, before a hacker ruins your morning, or make your sleepless nights.
In this article, you will learn how to update TimThumb file in WordPress Theme.
Step 1: Get Latest Timthumb.php for WordPress
As mentioned about the security flaws with the timthumb.php, so our first step will be to get the latest version thumb file. You can download Timthumb.php source code from here. Another option, is to copy entire source code and edit existing Timthumb.php file. Move on to the next step which is to find timthumb file location.
Step 2: How to find Timthumb file location ?
As mentioned above about timthumb.php, which is a script used by developers to resize post images / slider images, so it can be found within the Theme/Plugin Directory. Depending upon various plugin and theme developers, name of the file can be either thumb.php or timthumb.php.
For Thesis users, location of timthumb file in thesis theme is wp-content/thesis_18/lib/scripts/thumb.php
Step 3: Why wait, replace new timthumb file asap!
If you know the location of timthumb.php file, without any further delays, just replace timthumb with its newer version and upload it on server using ftp. Once done, take a breather and relax! What next ?
Did you check other web directories ?
Analyse all web directories
Well, I just told you to relax but we are not done yet. Make sure that you have not skipped any inactive themes directory or plugins, as this vulnerability applies to each timthumb file, regardless of whether it is active or executed by the server. I recommend you to delete all inactive themes and update existing ones to the latest versions.
Phew! And with this you have saved your valuable asset from being hacked, but not until next time. 😛
If you have any query or further assistance required then you can leave your comments below.
Something which reflects in using a Google Product is its performance. Google offers a lot of webmaster tools, which allows you to track page load time such as by using Google Analytics Code in WordPress. But launch of Google +1 Like button was not that effective, rather it couldn’t perform well in terms of speed and efficiency. If you have a set of Social mediacount buttons on website, Google +1 button is the last one to load. Wake up Google, you are not one of the Lazy asses. 😛
Well, finally we have an update from Google, The Faster +1 Button. The following article is about the new Google +1 button update and why it loads 3 times faster now.
Google Plus One Button Update
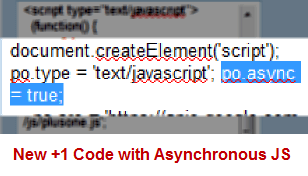
After getting feedback and a lot of complaints such as, +1 button takes long time to load, Google released this update for plus one button. Google claims that they have improved +1 button code and now it will load 3 times faster than the old +1 button.
How New Google Plus Button Loads Faster ?
New Plus One Button Update
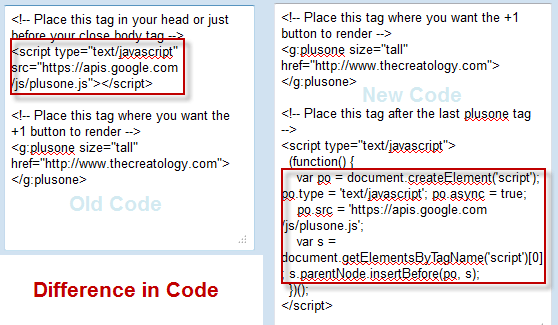
When a page is loaded on browser, JavaScript loads itself synchronously and causing page load delays. But if we use Asynchronous JavaScript, also knows as AJAX, which lets browser to download JS file, while in parallel the page continues to load on browser and we don’t experience delays. Google has also introduced asynchronous snippet as improvement in new code and claims 3 times faster speed. You may refer the screenshot below which shows you the difference between old +1 button code and new +1 button code.
Difference between New plus code and old code
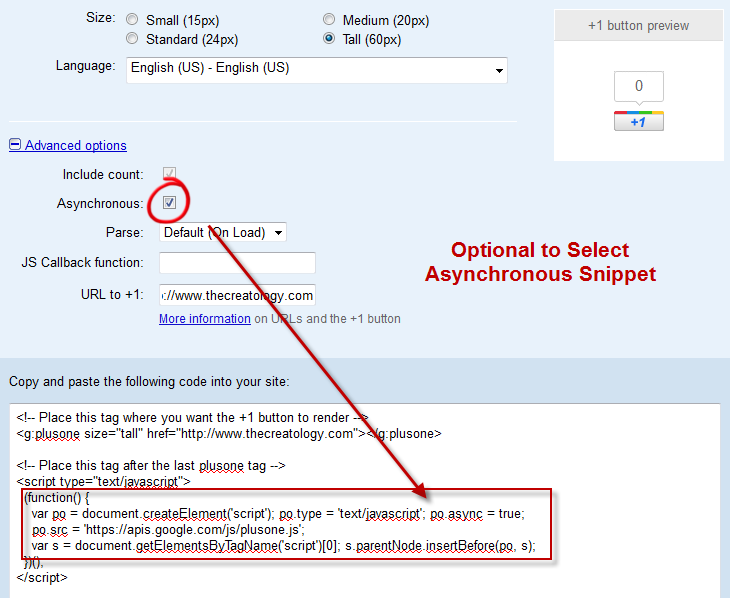
The above screenshot explains the difference of old code and the new +1 code with Asynchronous Snippet. Google Plus has a configuration tool which allows you to select between old code and new code. Refer to the screenshot below.
Configuration tool google plus one button
Once you grab your code from the configuration tool, check out below how to add new plus one button in WordPress.
Add fast Google +1 button in WordPress
Procedure to add new +1 button is similar but somehow if you missed it, you can read it here. Below is Google like button code for WordPress which you can add it in Single.php file.
Make sure you take full backup of single.php file using FTP before modifying it.
[php]
<g:plusone></g:plusone>
<script type="text/javascript">
(function() {
var po = document.createElement(‘script’); po.type = ‘text/javascript’; po.async = true;
po.src = ‘https://apis.google.com/js/plusone.js’;
var s = document.getElementsByTagName(‘script’)[0]; s.parentNode.insertBefore(po, s);
})();
</script>
[/php]
Once you have added the code, check load time of Google +1 button on your website. Do let us know your feedback about your experience with new Google Plus Button, by posting a comment below.
With this we come to the end of this article and I hope you and your folks will enjoy faster browsing experience with Google +1 button Update.
Almost every WordPress user is familiar with the JetPack Plugin by Automatic. JetPack WordPress plugin has been really innovative and has made things much easy for the bloggers.
Install JetPack Plugin
If you haven’t installed JetPack plugin up till now, then you are really missing the show. You can refer to my article on how to install jetpack plugin on WordPress blog and experience the power of WordPress jetpack plugin. On analyzing WordPress site stats, I found an interesting fact about Site Stats JetPack plugin, so I am sharing it with you.
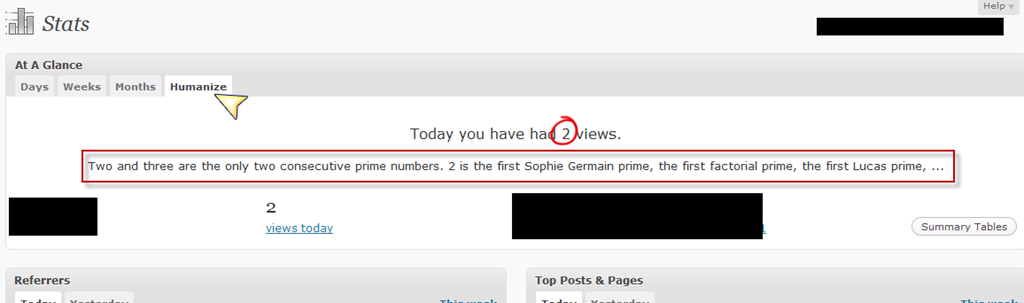
As we know about WordPress Site Stats plugin error and the problem was resolved by the JetPack plugin. New Site Stats plugin, has two types of representation for Site Stats. One is Bar Graph type and the other is Humanize Type. Bar Graph is a graphical representation of the site visits. Bar graph type can be tricky for users, who don’t even know what bar graph is. Respecting the fact, WordPress developed the Humanize type, as it explains the site stats value in a very humanly manner. Below is a screenshot of a WordPress site showing stats in Humanize Type. (Click to Zoom)
Humanize Type Site Stats Presentation
As you can see in above picture, how it says that “Today you have had 2 visits” and then how it explains the fact about number two (2) it says
Two and three are the only two consecutive prime numbers. 2 is the first Sophie Germain prime, the first factorial prime, the first Lucas prime, …
And WordPress jetpack plugin explains the facts for every number, like for number zero (0) it says
The number 0 is the smallest non-negative integer. The natural number following 0 is 1 and no natural number precedes 0.”
It though looks easy, but the concept behind is very innovative and thoughtful. I really appreciate WordPress Team behind the JetPack Humanize concept.
Did you think over it ? Let us know, if you came across any more interesting facts about WordPress, and share with us. Don’t forget to share your views about this concept, by posting a comment below. I will be waiting. 🙂