Category: News

The News category keeps you up to date with key changes in the digital, web and technology sectors. It covers platform updates, feature launches, security alerts and industry shifts that affect websites and online businesses.

Instead of just listing headlines, articles explain what each change means, who it affects and what actions to take. Coverage includes WordPress, plugins, tools, performance updates and evolving web standards.

If staying current matters to your workflow, this category delivers timely, practical insight without unnecessary noise so you can act quickly and make informed decisions.

  • Activate New Jetpack Comments Feature as Plugin goes 1.4.1

    It is amazing how Jetpack Plugin is improving day-by-day and introducing new features. Last Jetpack Plugin update was about new contact form option for Feedbacks and this time its enhanced Commenting System for WordPress. Arrh…that wasn’t loud! Let me say that again… Jetpack has added New JetPack Comments Feature, with its new version 1.4.1.

    Not sure what is Jetpack all about ? Click here to know more about Jetpack Plugin or click the JetPack picture below:
    JetPack Plugin Update for WordPress
    Click to Install Jetpack on WordPress!

    Whats New in Jetpack Plugin ?

    The new JetPack Commenting System  extends capabilities of conventional WordPress comments. You will find JetPack Comment widget in Dashboard once you have updated the plugin. It looks like below screenshot:
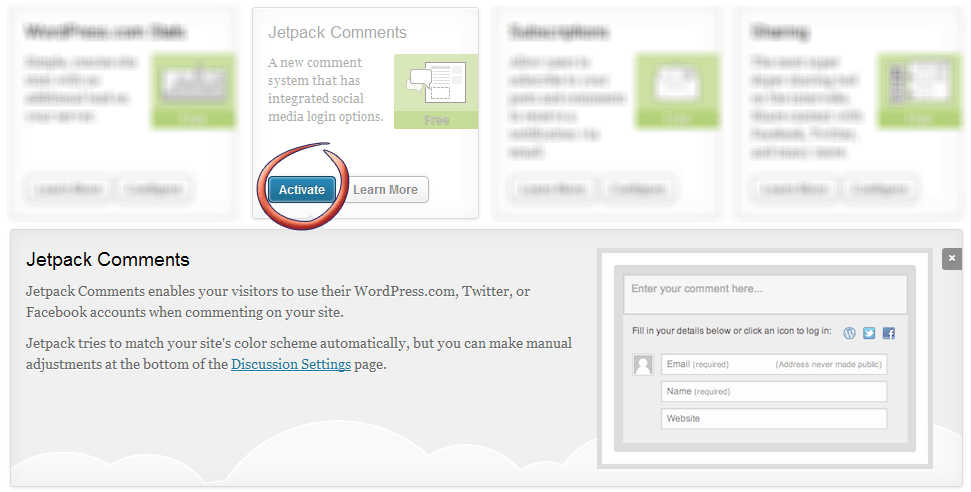
    JetPack Plugin update for New Commenting System
    Jetpack Comments Widget in Dashboard

    How to get Jetpack Comments Feature ?

    To get Comments Feature in blog, you will have to update Jetpack plugin. If don’t know how to update Jetpack Plugin follow a quick procedure below:

    • Login to WordPress Admin Panel and Navigate to Dashboard > Plugin.
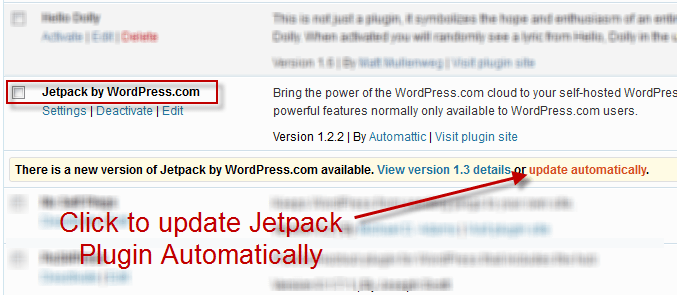
    • Find Jetpack Plugin Listed with other plugins. Click on Update Automatically link in orange, just like in the screenshot below:
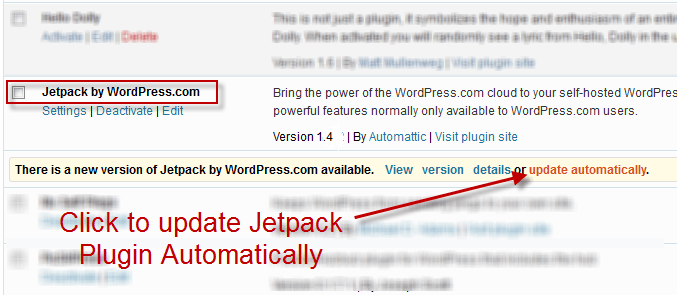
    JetPack Version Update 1-4-1
    Click on Update Automatically Link
    • After clicking the link you will get redirected to update plugin status page and you will see something similar as below screenshot.
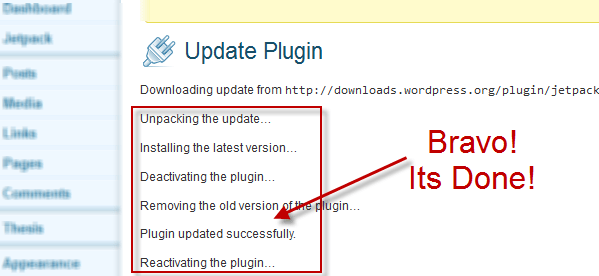
    Update Jetpack Plugin step2
    Plugin Updated Successfully!
    • Done? Now navigate to Dashboard > Jetpack to see JetPack Comment Widget.

    Pros & Cons for JetPack Comment

    Hah…you must be wondering about whether its worth installing on your WordPress Blog or it is not. Hmmmm…the list of Pros & Cons is especially for you to figure out, read below:

    PROS FOR INSTALLING JET PACK COMMENTS

    • Allows a commenter/visitor to use WordPress.com, Facebook or Twitter Account while posting a Comment on your site.
    • Enhanced Comment Form with jQuery Animation
    • 3 different Themes for Comment Form: Light, Dark & Transparent.
    • jQuery Validation for required Fields.

    CONS FOR INSTALLING JET PACK COMMENTS

    • Still using div html tags which states it is not on HTML5 completely.
    • Doesn’t work with Thesis Theme or other frameworks.
    • Increases page load time by 0.5-1 second/s.

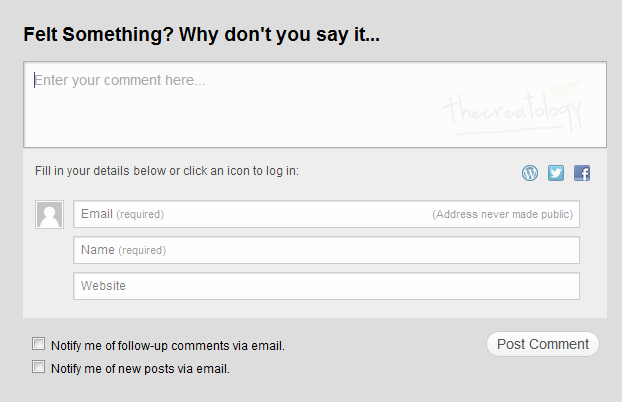
    Here is how a JetPack Comment Form looks like, on Twenty Eleven Theme:
    JetPack Comment Form on Twenty Eleven Theme
    Jetpack Comment Form on Twenty Eleven Theme

    What do you think ?

    Isn’t it feel good to have your WordPress Blog up-to-date & with latest features ? I believe nothing can beat that feeling, so what do you think about it? Share your thoughts with us about this New Jetpack Comments Feature introduced with Plugin Update 1.4.1. Of course, you can post a comment below. 😉

  • New Contact Form Feature in Jetpack Plugin Update

    Few hours back, WordPress notified to update Jetpack Plugin, which made me curious about new features. In last Jetpack Plugin update, New Subscription option was added with Extra Sidebar Widgets making easy for lazy bloggers. Hmmm…what we have now ? Well, Jetpack has added New Contact Form Feature, as they say its time to trash all other contact form plugins. 😛

    Not sure what is Jetpack all about ? Click here to know more about Jetpack Plugin.

    Jet Pack New update TheCreatology
    Know more about JetPack Plugin ?

    Whats New in Jetpack Plugin ?

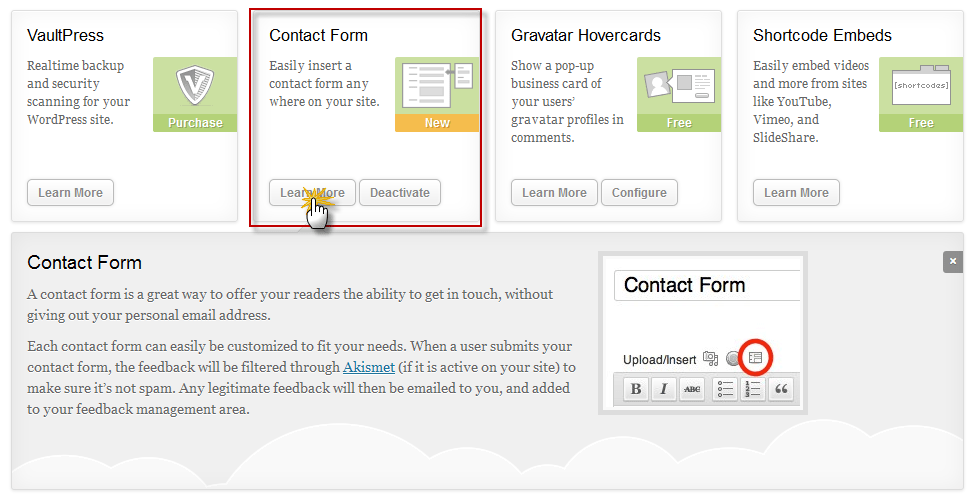
    Contact Form widget is what you will find in Jetpack Dashboard after updating the plugin. It looks similar to below screenshot:

    Contact Form Jetpack Plugin Update
    Contact Form Widget

    Get Contact Form Feature Jetpack Plugin

    To get Contact Form Feature in blog, you will have to update Jetpack plugin. If don’t know how to update Jetpack Plugin follow a quick procedure below:

    • Login to WordPress Admin Panel and Navigate to Dashboard > Plugin.
    • Find Jetpack Plugin Listed with other plugins. Click on Update Automatically link in orange, just like in the screenshot below:
    Update Jetpack Plugin step1
    Click Update Automatically Link
    • After clicking the link you will be redirected to update plugin status page. If you have good web hosting, then it will not take more than 5 seconds to update Jetpack Plugin and you will see something similar as below screenshot.
    Update Jetpack Plugin step2
    Jetpack Update Status
    • Well, we are done. Navigate to Dashboard > Jetpack to find Contact Form Feature Widget.

    Share Your Views

    I am sure this new update excites you as well, don’t forget to share your thoughts with us about New Contact Form Feature in Jetpack Plugin, by posting a comment below. 😉

  • Create Google+ Fan Page for your Website or Blog

    The wait is over now, as Google has used their trump card by launching Google+ Pages for Business. Yes, you can now create Google+ Pages for your websites, blogs, local business, brands and etcetera. Creating a Google+ Fan Page is, quite similar to a Facebook Fan Page, that you just need to login to your profile and get started. Not that easy ? Or doesn’t make sense to you ? Not a problem, you can simply follow rest of the article. 😉

    google-plus-pagesIn the article, we will learn how to create Google+ page for your blog or website. For your ease, I have divided this article into three easy steps, that is, Getting Started, Setup Info and Publish & Share.

    Getting Started: Create Google+ Page

    Let us get started with the creation of your first Google+ Page, follow the quick steps below:

    • Login to your Google+ Profile.
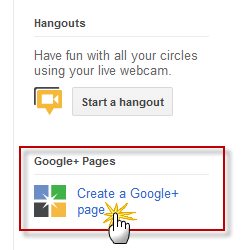
    • On the right pane look for Create a Google+ Page and click on the link or you can simply click here.
    create new google plus page
    Create new google plus page
    • After clicking the link, you will be redirected to a page similar to screenshot below:
    setup new google page
    Screen 1: Create a page
    • Enter the required details, for instance Name of the Page, Category, Website Link and privacy. Privacy is beneficial if you want to make your page private or limit page scope to people who connect the circle. Once done, click the red CREATE button and your page will be created.
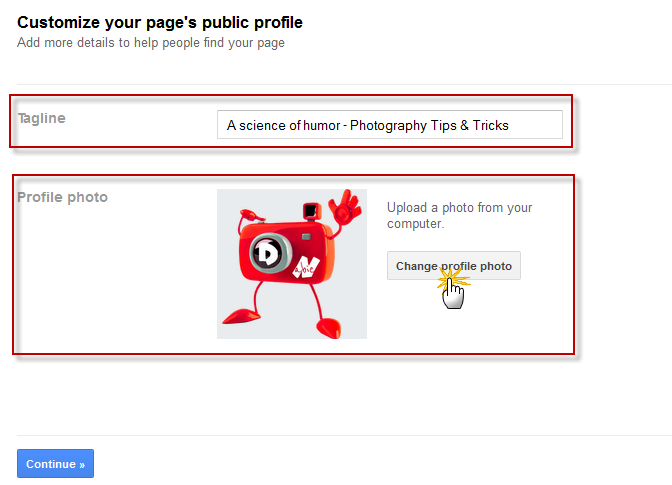
    • In next screen, you will be prompted to add a tagline and add image to Google Page, just like in the screenshot below:
    customize google page
    Screen 2: Customize Google Page
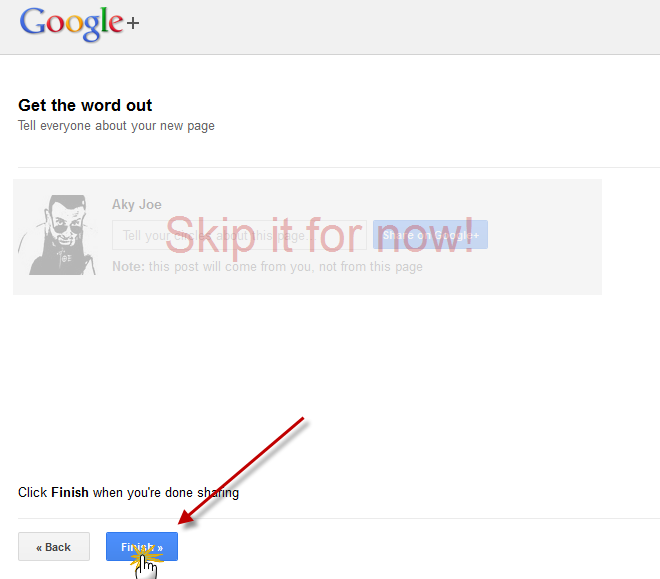
    • Once done, click Continue Button to save changes and move to next screen. In the next screen, Google will ask you to publish this page, but I recommend you to skip this step as it will share incomplete page to your fans. Click the Finish Button to complete Getting Started step. (refer to screenshot below)
    save google page changes
    Screen 3: Share Google Page

    Setup Info: Configure Google+ Page

    So now that you have created new Google Fan Page for website, we will have to setup few things before we publish or share it with your fans. Below are quick steps to setup profile of Google Fan Page:

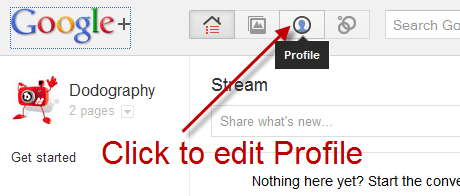
    • On the home screen, click the profile button as shown in the screenshot below.
    edit profile google fan page
    Edit Google Page profile
    • On the profile page, click the About Tab and press blue Edit Profile Button on top right.
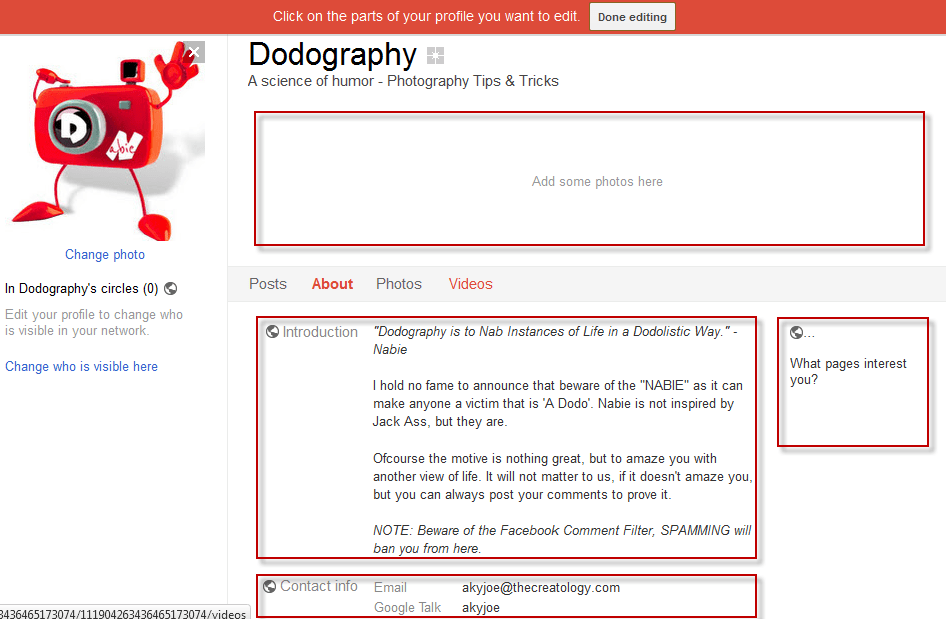
    • In the edit profile screen, you can change profile picture, add description, custom link on right pane and so on. (refer to the screenshot below)
    google fan page description
    Add profile information
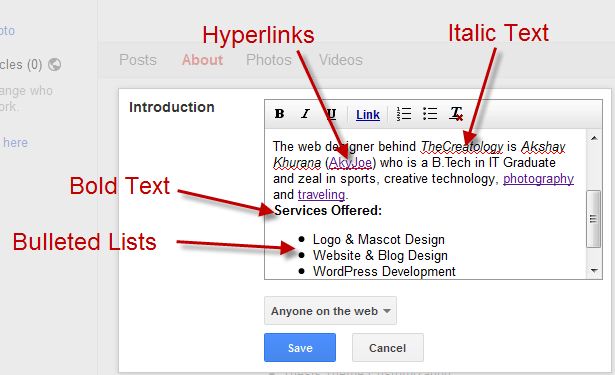
    • In Google+ Fan Page description has rich text editor, which also allows you to insert links, format text for bold, italics & underline, and bulleted & numbered list items. (refer to the screenshot below)
    format google page description
    Format Profile Description with Rich Text Editor

    Google Fan Page looks good ? Don’t miss to use rich text editor to format your description.

    • Once done, click the Save button and also the red top bar Done Editing button, when you finish editing the profile.

    Publish & Share Google+ Page with Friends

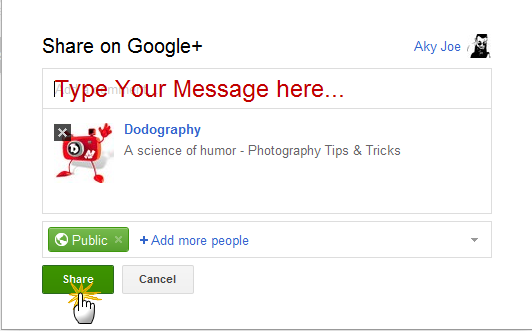
    Ready with your Google+ Fan Page ‘eh ? If so, then without any further delay we should promote the Google+ Fan Page with your friends. In the profile page itself hit the green Share your page Button, which you will see right below the profile picture. On clicking the green button, a window will open similar to screenshot below.

    share google fan page with friends
    Share Google Page with your friends

    In the share window, type your message, set the privacy level and hit the Share Button. Done ? GREAT! You have now successfully shared Google Page with your friends and with this we come to the end of this tutorial.

    Did you like Google+ Fan Page for your Blog ? Let us know by posting a comment below and you can also add TheCreatology on Google+.

  • Update Timthumb.php File in WordPress Theme Vulnerable to Hackers

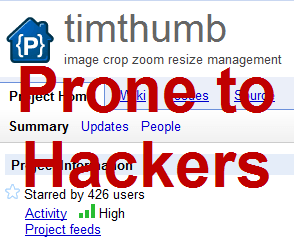
    I am wondering why there is no update from DIY Themes about new version of Thesis Theme as timthumb file is making Thesis Theme Websites vulnerable to hackers. It has been reported that certain version of Timthumb script http://code.google.com/p/timthumb/issues/detail?id=212 holds security hole and Thesis Theme uses Timthumb.php file for re-sizing an image. I have no clue when new Thesis version will arrive, hence being on safer side why don’t we just update Timthumb file manually. 😉

    timthumb-hacked
    Timthumb file prone to hackers

    Therefore this vulnerability may also exist in your WordPress Theme or a Thesis Theme. For people who have followed this article How to auto generate thumbnail in Thesis Theme without Plugin, I strongly recommend you to update timthumb.php file, before a hacker ruins your morning, or make your sleepless nights.

    In this article, you will learn how to update TimThumb file in WordPress Theme.

    Step 1: Get Latest Timthumb.php for WordPress

    As mentioned about the security flaws with the timthumb.php, so our first step will be to get the latest version thumb file. You can download Timthumb.php source code from here. Another option, is to copy entire source code and edit existing Timthumb.php file. Move on to the next step which is to find timthumb file location.

    Step 2: How to find Timthumb file location ?

    As mentioned above about timthumb.php, which is a script used by developers to resize post images / slider images, so it can be found within the Theme/Plugin Directory. Depending upon various plugin and theme developers, name of the file can be either thumb.php or timthumb.php.

    For Thesis users, location of timthumb file in thesis theme is wp-content/thesis_18/lib/scripts/thumb.php

    Step 3: Why wait, replace new timthumb file asap!

    If you know the location of timthumb.php file, without any further delays, just  replace timthumb with its newer version and upload it on server using ftp. Once done, take a breather and relax! What next ?

    Did you check  other web directories ?

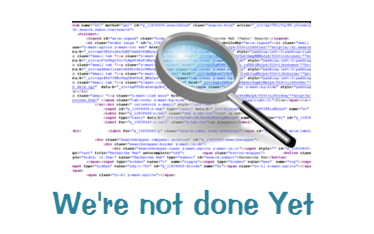
    timthumb-update-we are not done yet
    Analyse all web directories

    Well, I just told you to relax but we are not done yet. Make sure that you have not skipped any inactive themes directory or plugins, as this vulnerability applies to each timthumb file, regardless of whether it is active or executed by the server. I recommend you to delete all inactive themes and update existing ones to the latest versions.

    Phew! And with this you have saved your valuable asset from being hacked, but not until next time. 😛

    If you have any query or further assistance required then you can leave your comments below.

  • Google +1 button Update for Faster Page Load Time

    Something which reflects in using a Google Product is its performance. Google offers a lot of webmaster tools, which allows you to track page load time such as by using Google Analytics Code in WordPress. But launch of Google +1 Like button was not that effective, rather it couldn’t perform well in terms of speed and efficiency. If you have a set of Social media count buttons on website, Google +1 button is the last one to load. Wake up Google, you are not one of the Lazy asses. 😛

    google plus one button update

    Well, finally we have an update from Google, The Faster +1 Button. The following article is about the new Google +1 button update and why it loads 3 times faster now.

    Google Plus One Button Update

    After getting feedback and a lot of complaints such as, +1 button takes long time to load, Google released this update for plus one button. Google claims that they have improved +1 button code and now it will load 3 times faster than the old +1 button.

    How New Google Plus Button Loads Faster ?

    new plus one button update
    New Plus One Button Update

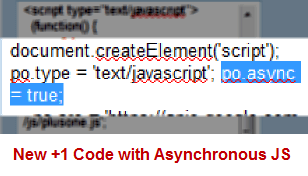
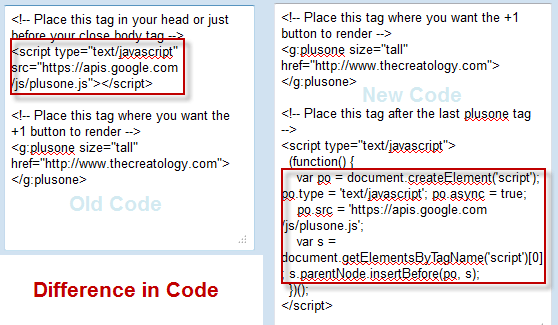
    When a page is loaded on browser, JavaScript loads itself synchronously and causing page load delays. But if we use Asynchronous JavaScript, also knows as AJAX, which lets browser to download JS file, while in parallel the page continues to load on browser and we don’t experience delays. Google has also introduced asynchronous snippet as improvement in new code and claims 3 times faster speed. You may refer the screenshot below which shows you the difference between old +1 button code and new +1 button code.

    difference between new plus code and old code
    Difference between New plus code and old code

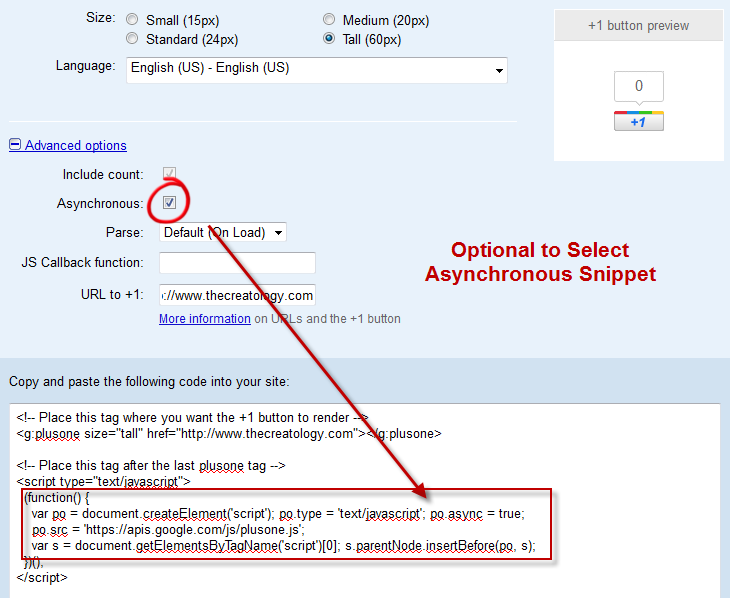
    The above screenshot explains the difference of old code and the new +1 code with Asynchronous Snippet. Google Plus has a configuration tool which allows you to select between old code and new code. Refer to the screenshot below.

    configuration tool google plus one button
    Configuration tool google plus one button

    Once you grab your code from the configuration tool, check out below how to add new plus one button in WordPress.

    Add fast Google +1 button in WordPress

    Procedure to add new +1 button is similar but somehow if you missed it, you can read it here. Below is Google like button code for WordPress which you can add it in Single.php file.

    Make sure you take full backup of single.php file using FTP before modifying it.

    [php]
    <g:plusone></g:plusone>
    <script type="text/javascript">
    (function() {
    var po = document.createElement(‘script’); po.type = ‘text/javascript’; po.async = true;
    po.src = ‘https://apis.google.com/js/plusone.js’;
    var s = document.getElementsByTagName(‘script’)[0]; s.parentNode.insertBefore(po, s);
    })();
    </script>
    [/php]

    Once you have added the code, check load time of Google +1 button on your website. Do let us know your feedback about your experience with new Google Plus Button, by posting a comment below.

    With this we come to the end of this article and I hope you and your folks will enjoy faster browsing experience with Google +1 button Update.

  • Twitter launches New Follow Button for Website

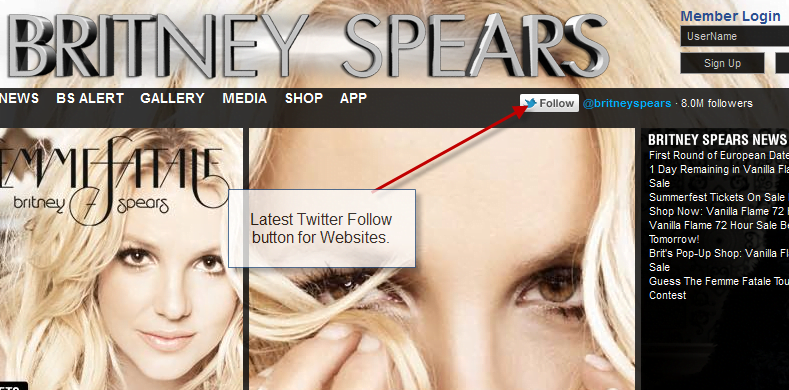
    Twitter is doing everything to keep itself in competition with Facebook. Just like the Facebook Like Button, Twitter has launched New Follow Button for Website. Using the new follow button on website, it will directly follow the twitter account and instead going to the twitter profile and then clicking Follow Button. Check out the screenshot showing Britney Spears’ Website using New Twitter Follow Button.

    britney-spears-website-using-follow-button
    Britney Spears Website using Twitter button

    Especially for the publishers, new Twitter Follow button on blog will increase more number of Followers than the retweet button, as it’s just click –a –way. 😉 I think Twitter button will be more efficient and powerful than a Facebook Like Button. If you are looking forward to add new twitter button on website, you can configure it right here.

    Do share your opinions, about the launch of new twitter button, by posting a comment below. 🙂