Tag: wordpress plugin

  • How to add twitter feed in WordPress Blog using Jetpack plugin

    If are you on twitter, then you can display latest tweets on WordPress Blog. By adding twitter feed in Website, visitors can keep track of your latest tweets and one-click to follow you on twitter.

    twitter-stream-whale
    Twitter Stream Illustration

    A latest plugin by automatic JetPack features to add twitter stream in sidebar with ease. In the article we will learn how to add twitter feed in WordPress using Jetpack plugin. Below is a simple stepwise procedure:

    Step 1: Install Jetpack plugin

    I have already mentioned in the article how to install jetpack plugin on wordpress. Once the jetpack is installed proceed to Step 2.

    Step 2: Configure Twitter Widget

    When Jetpack plugin is installed and configured, by default it activates Twitter Widget which can be configured by Navigating to Appearance > Widgets, as you can see in the screenshot below.
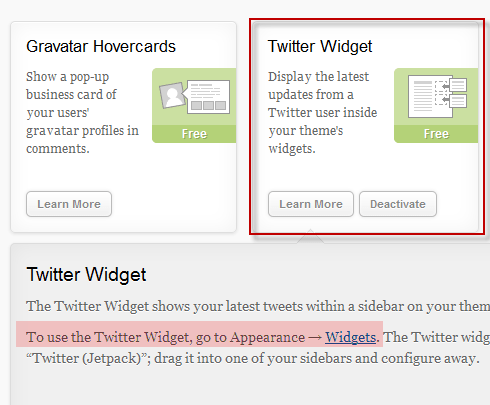
    Jetpack plugin twitter widget
    Twitter Widget Jetpack dashboard

    Step 3: Show Tweets on Blog

    In order to display latest tweets on sidebar, follow the procedure below to add twitter widget:

    • Navigate to Appearance > Widgets.
    • Find Twitter (Jetpack) widget in the list and Drag it to sidebar.
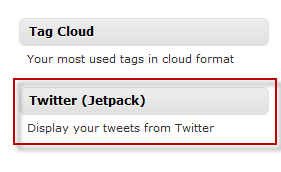
    Jetpack Twitter Stream Widget for Sidebar
    Twitter Jetpack Widget
    • Now configure twitter jetpack settings for title, twitter name, number of tweets to show etc. Refer to screenshot below:
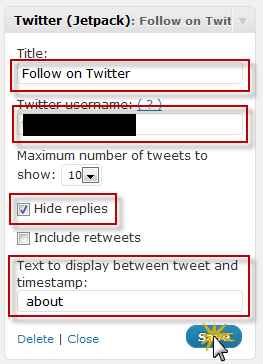
    Configure Twitter Widget Sidebar
    Twitter Widget Settings
    • Once done with the settings, click on Save button.

    We are Done!

    As we are done with installation and configuration, now its time to see things live in action. Refresh the website and you will find twitter stream in sidebar similar to the screenshot below.
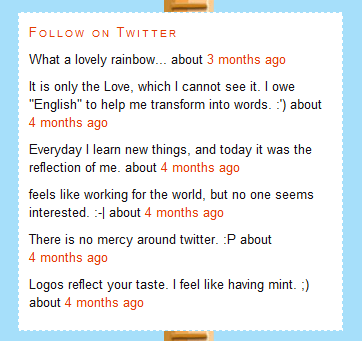
    Twitter Stream in wordpress sidebar
    Twitter Stream Live on Sidebar

    Here we come to the end of this tutorial, where we learned to add twitter feed in WordPress blog. If you have any query or any assistance is required, feel free to post comment as your feedback.
  • WP Stats not working on WordPress Blog says not authorized to view the stats

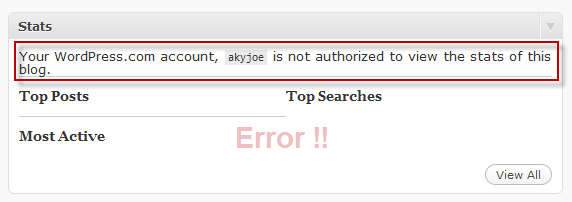
    A recent update from the Automatic company which runs WordPress is innovating its cloud architecture day by day. Today, when I logged in my Dashboard, I found that my WordPress Stats not working, as it said “Your WordPress.com account, akyjoe is not authorized to view the stats of this blog.”

    WordPress Stats not working error
    WP Stats error on Blog

    I logged in my WordPress account to check my WordPress API key, but everything seemed to be fine. Then I looked up on web and found couple of announcements from the WordPress regarding WP Stats plugin issue. In this article we will learn to fix wp stats problem on wordpress blog.

    How to fix WP Stats issue ?

    Since WordPress Stats plugin has been updated with the launch of latest plugin by Automatic, is JetPack. So, in order to fix wp-stats plugin, refer to the article to install jetpack plugin for wordpress.

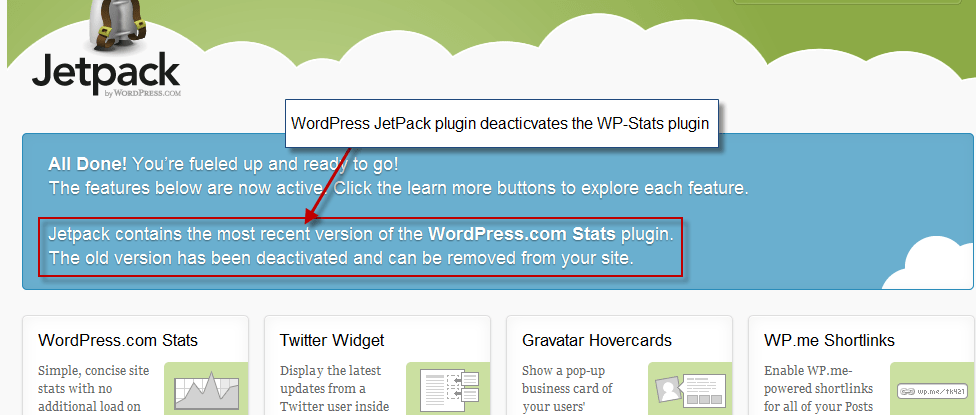
    After you install jetpack plugin for wordpress, you will see the a message saying that “Jetpack contains the most recent version of the WordPress.com Stats plugin. The old version has been deactivated and can be removed from your site.” You can refer to the screenshot below.

    WordPress jectpack plugin installation
    JetPack Plugin Welcome Message!

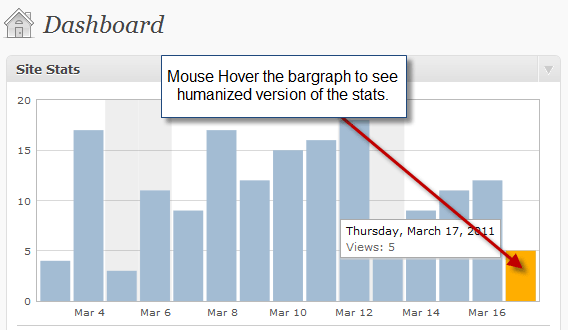
    Now once the plugin is installed you will notice that the old wordpress stats plugin will be deactivated and the stats will be replaced by the new wp stats by jetpack, as you can see the screenshot below.

    New-wp-stats-jetpack-plugin
    New WpStats by JetPack

    When I fixed this issue and I found that the latest version of stats is more precise and it gives more detailed reports about the site visits and hits. I hope this tutorial will fix problem of wp stats easily.

    If you have any query or need any further assistance, you send us feedback by posting a comment below.

  • How to install JetPack on WordPress blog ?

    JetPack plugin is latest by Automatic which improve wordpress blog performance. Jetpack plugin comes with lots of feature like site stats, twitter widget, gravtar hovercard, sharedaddy and many more. WordPress is trying to cover the market, and making blogger to minify third party plugins dependency. I really admire this thought and I don’t depend on third party plugins, as you never know when they make you land in deadlock situations.

    jetpack-new-update-thecreatology
    JetPack Plugin for WordPress

    In this tutorial, we will learn to install jetpack plugin on wordpress blog. Below is a 3-step  procedure which will help you achieve the objective.

    Step 1: Install JetPack Plugin on WordPress

    • In order install jetpack plugin, login to your dashboard admin of wordpress.
    • Navigate to Dashboard > Plugins > Add New Plugin.
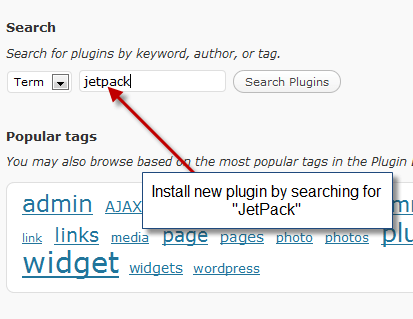
    • Type “jetpack” in the search box and press search button. Refer to the screenshot below.
    step1- searchl-jetpack-plugin-on-wordpress
    Search for JetPlugin
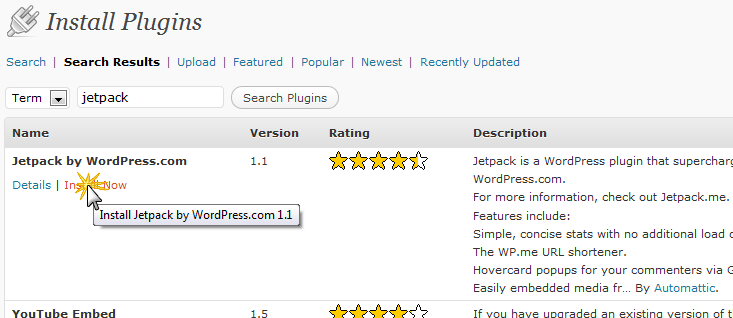
    • As the search results get listed, Click on Install Now button which says “JetPack by wordpress.com”. Refer to the screenshot below.
    step2- install-jetpack-plugin-on-wordpress
    Install JetPack Plugin
    • Once installed, click on activate button and we are done with the installation of JetPack Plugin. Proceed to next step to authorize jetpack plugin.

    Step 2: Authorize JetPack with WordPress.com

    Since JetPack is a wordpress.com plugin, it needs authorization. Make sure you login to your wordpress.com account before you proceed further. If you don’t have one, then you will require to create one.

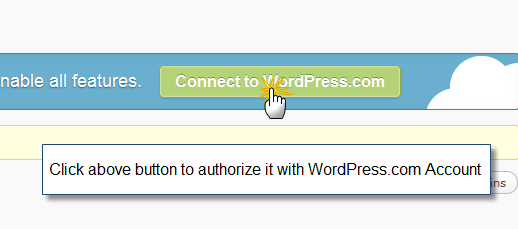
    • On activating the jetpack plugin you will notice a message above the list of plugin saying “Connect to WordPress.com”, just like the screenshot below.
    step3- authorize-jetpack-plugin-on-wordpress
    Connect to WordPress.com
    • Click on green button to authorize it and you will be asked to authorize it in next screen similar to one below:
    step3-1 authorize-jetpack-plugin-on-wordpress
    Authorize JetPack Plugin
    • Click on the Authorize JetPack button, in order to connect with wordpress.com
    • Once don, you will be redirected to JetPack Dashboard, where you can configure jetpack plugin.

    Step 3: JetPack Plugin Dashboard

    JetPack has its own admin panel which allows you to configure various options like site stats, twitter widget etc. You can refer to the screenshot below which shows jetpack admin panel.

    step4 configure-jetpack-plugin-on-wordpress
    JetPack Dashboard

    We are done!

    We are done with the installation of jetpack plugin and you can now play around with its features and I will come up with more articles soon, to configure jetpack plugin. Do let us know, how did you find the jetpack plugin, by posting a comment below.