JetPack plugin is latest by Automatic which improve wordpress blog performance. Jetpack plugin comes with lots of feature like site stats, twitter widget, gravtar hovercard, sharedaddy and many more. WordPress is trying to cover the market, and making blogger to minify third party plugins dependency. I really admire this thought and I don’t depend on third party plugins, as you never know when they make you land in deadlock situations.

In this tutorial, we will learn to install jetpack plugin on wordpress blog. Below is a 3-step procedure which will help you achieve the objective.
Step 1: Install JetPack Plugin on WordPress
- In order install jetpack plugin, login to your dashboard admin of wordpress.
- Navigate to Dashboard > Plugins > Add New Plugin.
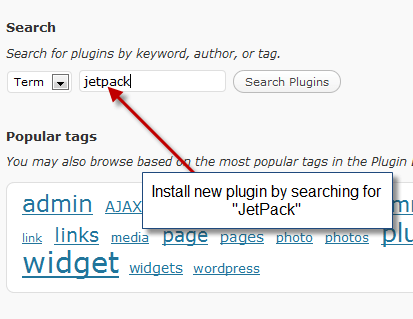
- Type “jetpack” in the search box and press search button. Refer to the screenshot below.
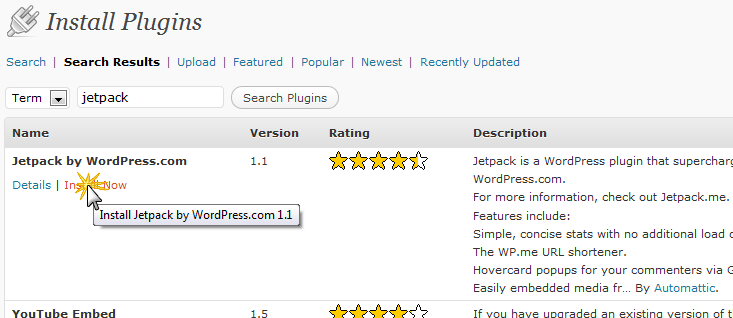
- As the search results get listed, Click on Install Now button which says “JetPack by wordpress.com”. Refer to the screenshot below.
- Once installed, click on activate button and we are done with the installation of JetPack Plugin. Proceed to next step to authorize jetpack plugin.
Step 2: Authorize JetPack with WordPress.com
Since JetPack is a wordpress.com plugin, it needs authorization. Make sure you login to your wordpress.com account before you proceed further. If you don’t have one, then you will require to create one.
- On activating the jetpack plugin you will notice a message above the list of plugin saying “Connect to WordPress.com”, just like the screenshot below.
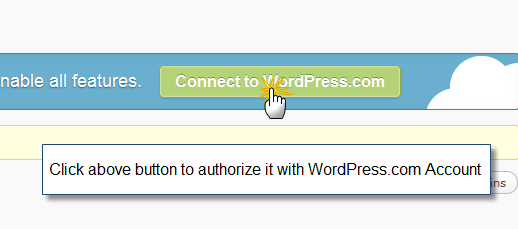
- Click on green button to authorize it and you will be asked to authorize it in next screen similar to one below:

- Click on the Authorize JetPack button, in order to connect with wordpress.com
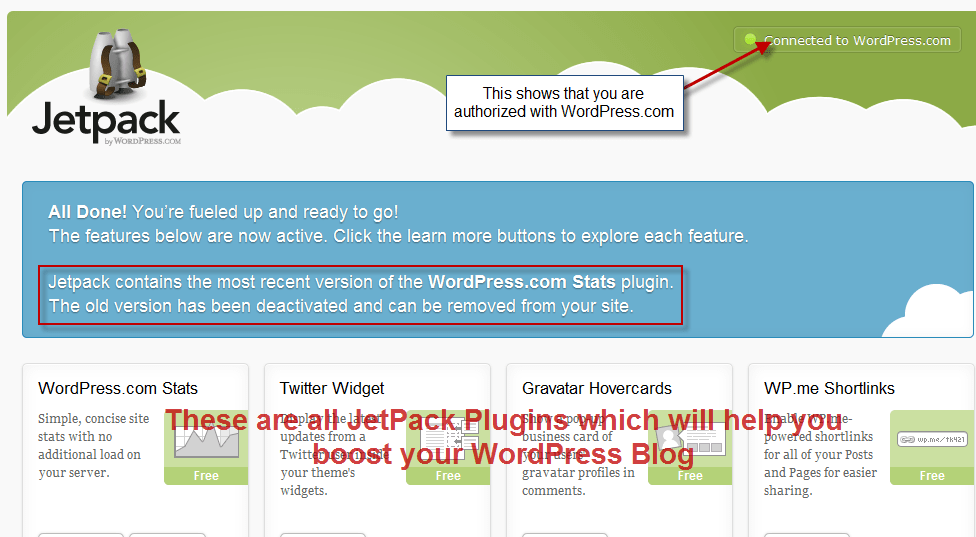
- Once don, you will be redirected to JetPack Dashboard, where you can configure jetpack plugin.
Step 3: JetPack Plugin Dashboard
JetPack has its own admin panel which allows you to configure various options like site stats, twitter widget etc. You can refer to the screenshot below which shows jetpack admin panel.
We are done!
We are done with the installation of jetpack plugin and you can now play around with its features and I will come up with more articles soon, to configure jetpack plugin. Do let us know, how did you find the jetpack plugin, by posting a comment below.


Leave a Reply